How to Repair the The majority of Common Air conditioning unit Problems Yourself


Our specialists explain tips on how to maintenance the most common reasons behind central atmosphere conditioning service failures.
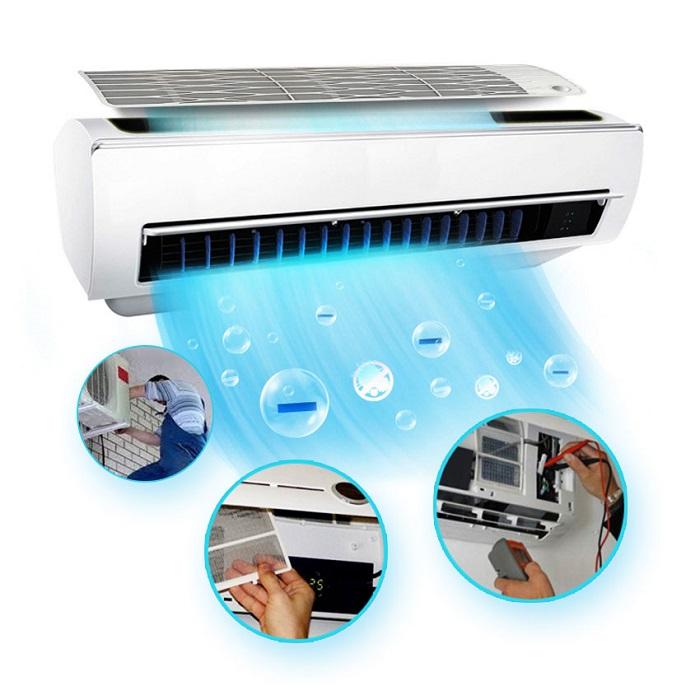
air conditioning service repair featured graphic
FAMILY HANDYMAN
Next Project
Introduction
Our own experts shows you easy DIY alternatives for common key air conditioning repairs. Likely to be ready to go faster and will preserve the expense involving a service contact.
Tools Required
Changeable wrench
Drill/driver instructions cordless
Insulated screwdriver
Multimeter
Needle-nose pliers
Nut motorist
Socket/ratchet set
Voltage tester
Materials Essential
Capacitor
Compressed surroundings
Fondre fan electric motor
Contactor
Fuses
DIY Surroundings Conditioning Service Fix
If you core ac system ceases working during a brutal summer high temperature wave, you will be holding out days, if not days, for an session with a restoration technician to repair it, also it? s i9000 probably going to be able to cost a several hundred dollars. Even so, if you? re also comfortable working around electricity and willing to spend below $100 on pieces, you can possibly repair your air flow conditioner yourself on about two hours.
We talked in order to local HVAC maintenance technicians to obtain their best do-it-yourself AIR CONDITIONING UNIT fan repair and even maintenance tips. These types of tips will assist you with the most typical? low cooling? and? no cooling? troubles.
You? ll will need a few simple tools: multimeter, a voltage detector, an assortment of insulated screwdrivers along with a socket set.
When these AC maintenance don? t job, at least an individual? ve covered the particular most common downfalls, and your support guy can focus on choosing the more elusive problem. Additionally, with the brand new parts, you? ll likely add years of breakdown-free air fitness. Here? s precisely how to start.
sửa điều hòa giá rẻ Exactly why is My Air Refresher Not Cooling typically the House?
Guarantee the Difficulty Isn? t the Furnace
Set your thermostat to AIR CONDITIONING mode and decrease the temperature environment. If the furnace fan kicks inside, the problem isn? t in the particular furnace. In the event the fan doesn? t work, try resetting typically the furnace circuit breaker. If the fan still won? to start, call a professional? the fixes shown here won? capital t work.
Next, look into the outside condensing product. The compressor (which sounds like some sort of refrigerator) and supporter should be running. In the event that not, follow the maintenance and repair methods shown here.
Extreme care: Turn Off the strength
Turn off the A/C and heater breakers in the particular main electrical -panel before pulling the outdoor disconnect or removing the distilling unit? s access panel. Then use a voltage tester around the wires coming into the contactor to make sure the ability is really off.
AIR CONDITIONING Doesn? t Operate? Buy Parts
The particular AC contactor (relay) and start/run capacitor(s) (see illustration below) fail most generally and they are inexpensive. So it? s a new safe bet to get and install those parts right apart, particularly if your weather conditioning service device is over the age of 5 years. The fondre fan motor can also fail, but it really runs about $150? hold off buying that unless you? re sure that? s i9000 the culprit.
To get replacement parts, locate the nameplate about the condensing device (not your furnace). Jot down the particular make, model in addition to serial number (or have a photo). Get the parts with an appliance retail outlet, furnace dealer or even online.
ADVERTISEMENT
Read Next
What Is usually Cleaning Vinegar and How to Work with ItPlay icon
Precisely what is Cleaning Vinegar as well as how to Use It
Normal Dryer Repairs You Can Do YourselfPlay icon
Common Clothes dryer Repairs You Can easily Do On your own
being unfaithful Ways to Dried out Clothes Without a Drier
9 Ways to be able to Dry Clothes With out a Clothes dryer
Sign Upward For Our E-newsletter
Complete DIY assignments like an expert! Sign up for our e-zine!
Current email address
SIGN UP
Project step-by-step (8)
Step 1
Learn the Anatomy of some sort of Central Home Surroundings Conditioner
Central house air conditioner service systems consist involving two major components: a condenser that will sits outside your own house as well as the evaporator coil (often referred to as a great A-coil) that sits inside the plenum regarding your furnace or perhaps air handler. The particular refrigerant inside the A-coil picks up the heat from your house and moves it to the outside condensing unit. Typically the condensing unit supporter blows outside atmosphere through the condensing coil to eliminate the heat. The condensing unit houses the three elements replaceable by the DIYer: the AIR CONDITIONING contactor, the start/run capacitor(s) and the condenser fan motor. Typically the condensing unit in addition houses the air compressor, but merely a professional can replace that will. The A-coil offers no parts that can be serviced by a DIYer.
diagram involving a central home air conditioner
FAMILY MEMBERS HANDYMAN
Step 2
Shut Off the Energy
Open the electric powered box next to typically the condensing unit in addition to pull the disconnect block straight out.
Check inside the box with a volt quality sniffer to help make sure the power is really off.
air-con support shut off the ability
FAMILY HANDYMAN
ADVERTISING CAMPAIGN
ADVERTISEMENT
Step a few
Brush your Condenser Coils
It? s definitely easy to completely clean a great air conditioner fondre, and it? s i9000 one of many regular maintenance tasks that will certainly extend living regarding your unit.
Aim your garden nozzle upward into the particular top of typically the condenser coil to remove the crud buildup underneath the cover.
Work all the way all-around the coil. Next aim the nozzle down and get rid of the debris down the coil fins.
Adapt the nozzle to some gentler stream and even shoot water into the coils in order to flush out any remaining debris.
clean condenser coils about ac
FAMILY RENOVATOR
Step 4
Test the Fuses
Many detach blocks contain a couple of cartridge fuses. Verify them before an individual proceed with vehicle repairs. A blown join is a sign of an unable part inside the condensing unit. So don? t merely replace it and think you? ve solved the difficulty. Instead, replace the particular parts, install new fuses, and open fire up the product. Whether it blows once more, call an expert? you? ve received more serious problems.
How to Take a look at Fuses In the Disconnect Block
Arranged your multimeter to be able to the lowest Ohms scale and touch the red and even black leads to opposite ends involving each fuse.
When you get a new numerical reading, the particular fuse is great.
A zero, a new minus symbol, or an infinity image (? ) signifies a blown join.
air conditioner join block pull outside
FAMILY HANDYMAN
ADVERTISING
ADVERTISEMENT
Step 5
Inspect the interior involving the Access Screen
Follow the power conduit from the particular house? that? t where you? lmost all find the gain access to panel. With typically the power off, eliminate and store the access-panel retaining screws plus remove the -panel. Before you substitute any parts, look at for rodents? nests or evidence of eating on wires and electrical connectors.
In the event that you find damaged wires or chewed insulation and can easily safely handle power repairs, discharge typically the capacitor first. And then repair the wires and eliminate the nest. Otherwise, phone a pro.
How to Discharge a Twin Start/Run Capacitor
Take away the capacitor from the retaining bracket.
After that touch an insulated screwdriver between typically the HERM (or? H? ) terminal and the COMMON (or? C? ) port.
Do the identical involving the FAN (or? F? ) terminal as well as the? C? port.
On single-mode capacitors, just make a brief between the two terminals.
inspect access panel in air conditioning unit
FAMILY HANDYMAN
Step 6
Replace the Start/Run Capacitor(s)
All air conditioning service products have a minumum of one capacitor. The capacitor retailers electricity and lets out it during converter and condenser enthusiast startup to provide each motors extra jolt of power. And it smooths away voltage fluctuations to shield the compressor plus condenser fan engine from damage.
Capacitors can degrade gradually, providing less startup power over time. Or they may fail in an instant. Progressive capacitor failure can easily go unnoticed for some time, stressing the compressor and condenser cooling fan motor windings, causing their early malfunction. Since capacitors will be cheap, it makes sense to proactively replace yours about every single five years.
How to Replace a Capacitator
Take a photograph of the wire connections before disconnecting anything (you may need a reference afterwards on).
Discharge the particular stored energy in the old capacitor.
Use needle-nose pliers to pluck a single wire at a time through the old capacitor and snap it onto the matching tab of typically the new capacitor. The female crimp fittings should snap securely onto the capacitor tabs.
Wiggle every single connector to see if it? s tight. If it? h not, remove the connection and bend typically the rounded edges of it so this the tighter suit on the tab.
Any time you? ve changed all the cables, secure the brand new capacitor.
WARNING: Discharge the capacitor ahead of disconnecting wires or even removing it coming from its bracket.
Install the new air conditioning unit capacitor
FAMILY RENOVATOR
ADVERTISEMENT
ADVERTISEMENT
Step 7
Replace the AC Contactor
An AC contactor is the $25 mechanical exchange that uses low voltage power through the thermal to switch 220-volt high-amperage current for the compressor and fondre fan. AC contactors can wear out there and therefore are at the particular top of typically the list of common air conditioning assistance failures. Even when your AC contactor is working, that pays to replace it every six years or so. Unscrew the old AIR CONDITIONING UNIT contactor before getting rid of the wires. In that case move the wires to the brand new unit.
Yank a new connector off typically the old contactor and even move it in order to the same area on the fresh part.
Tighten the particular connectors where needed.
Secure the fresh contactor within the distilling unit.
affect the air conditioning unit contactor
FAMILY HANDYMAN
Step 6
Precisely how to Test Your current Fixes
Reinstall typically the access panel and even disconnect block.
Switch on the routine breaker and furnace switch, then arranged the thermostat in order to a lower temperature and wait with regard to the AC to be able to start.
The air compressor should run as well as the condenser fan ought to spin.
If the particular compressor starts yet the fan doesn? t, the enthusiast motor is likely chance.
Shut off the energy and remove typically the screws around the condenser cover.
Pick up the cover in addition to remove the fan blade and drive mechanism.
Reinstall the cutter and secure the particular cover.
Then repower the unit and see if typically the fan starts.
In the event that it doesn? t, you? ve offered it your top shot? it? s i9000 time to call a pro.
Affect the supporter motor in air flow conditioner
FAMILY RENOVATOR
Be Patient at Startup
AC products and thermostats have built-in delay functions when they? re shut down and then repowered. The delay could be as extended as a couple of minutes. Plus, if you? empieza subscribed to an energy-saving device coming from your local electrical power utility, the unit can easily take even more time to reset. In case you? ve installed the parts shown and even reinstalled the detachment block, repowered the particular circuit breaker, turned on the switch at the furnace, moved the thermostat to AC mode and reduced the temperature below the indoor temperature, along with the unit doesn? big t fire up right after half an hour, it? s i9000 time to call a pro.